sewing knits

How to Adjust Serger Tension - VIDEO TUTORIAL

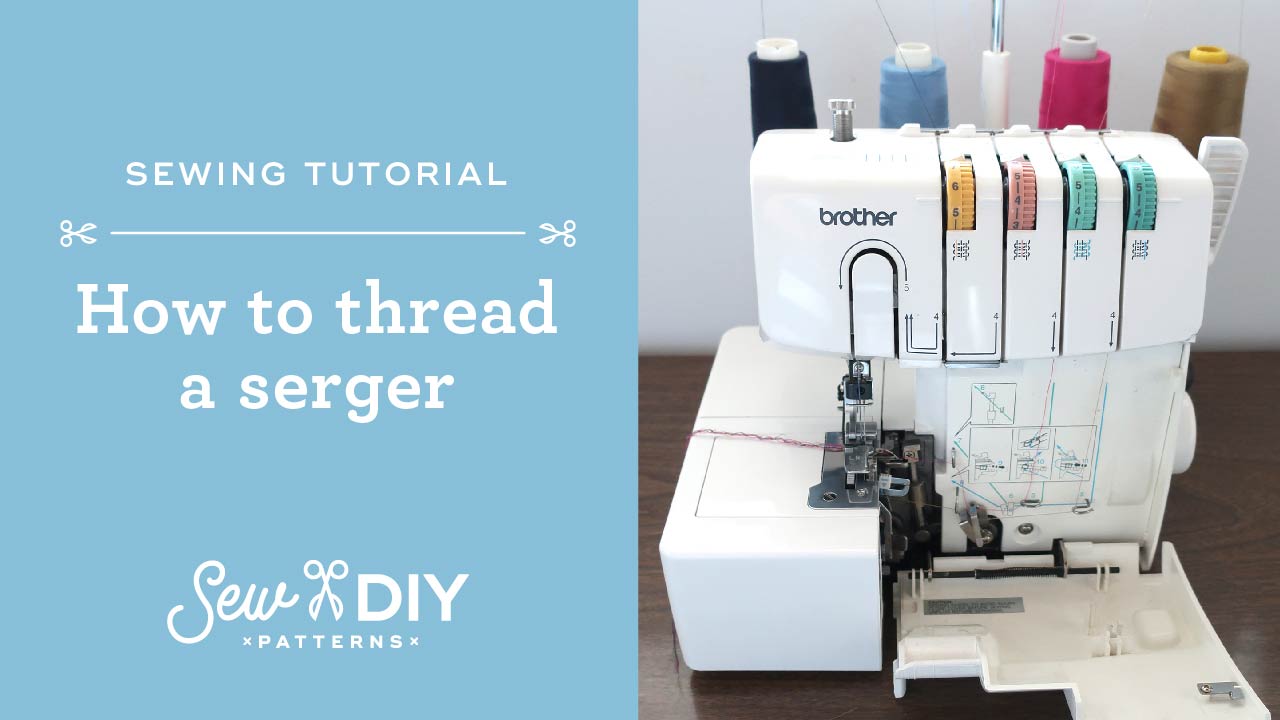
Let’s face it. Serger tension can be tricky AND it takes a lot of patience. All those threads create beautiful, and dare I say magical, overcast stitches but they also create more opportunities for a tension issue. Each thread has a tension dial that can either be too tight or too loose, meaning you have 8 different options for how to adjust the tension. In today’s YouTube video, I give some tips for adjusting the tension on your machine and show some common tension issues.

If you’re running short on time today, here’s a quick rundown of my top tips for adjusting the tension dials on your serger or overlocker:

1. Test out your tension on a scrap of fabric before you stitch your garment (and make sure to use the same fabric and number of layers that you plan on stitching)

2. Evaluate the stitches and consult your serger manual to identify the possible issue

3. Adjust only one dial at a time. Snap a photo with your phone if you tend to forget what adjustments you’ve been making.

4. Have patience. It’s a process of trial and error and will take a little bit of time to find the best tension settings for your fabric.

I hope that you’ve enjoyed this video. I have a whole series of YouTube videos planned focused on tips and tutorials for sewing with knits. In case you missed it, make sure to check out last week’s video “How to Thread a Serger". And if you haven’t done so already, I’d be so grateful if you subscribe to my channel on YouTube. Happy sewing!

How to Thread a Brother 1034D Serger - VIDEO tutorial

A few weeks ago, I did a poll on Instagram asking what people’s biggest problems were when sewing knits. One issue that kept coming up was how to use a serger. Threading a serger can often be intimidating but with a little practice, you’ll feel comfortable with it in no time. The video will show you step by step how to thread this machine. I can’t say it enough, so it bears repeating that the most important thing is to thread the machine in the correct order. I also recommend practicing threading the machine so that you become comfortable with the process.

I hope that you’ve enjoyed this video. I have a whole series of YouTube videos planned focused on tips and tutorials for sewing with knits. In case you missed it, make sure to check out last week’s video 6 Tips for Sewing with Knit Fabrics. And if you haven’t done so already, I’d be so grateful if you subscribe to my channel on YouTube.

Six Tips for Sewing with Knit Fabrics Video

Six Tips for Sewing with Knit Fabric - Video from Sew DIY

Today I’m excited to share a new video with my top 6 tips for getting started sewing with knit fabric. When I first wanted to start sewing knits over 10 years ago, I was really intimidated because I didn’t know what to do. Over the years, I’ve done a lot research and had a lot of practice and now I love to sew with knit fabric. I’m planning a whole series of videos about sewing knit fabric so after you watch this one, make sure to subscribe to my channel on YouTube so you won’t miss any future videos. 

Six Tips for Sewing with Knit Fabric

  1. Find the straight of grain by holding up the fabric with the selvages of the fabric aligned. Shift the selvages to the left and right until the fabric hangs straight and doesn’t have any drag lines.

  2. Use a rotary cutter for better accuracy.

  3. Use a stitch with stretch (more on that down below)

  4. Use a walking foot or, if you don’t have one stitch with tissue paper under your fabric to help it feed through the machine.

  5. Use a ballpoint or jersey needle. This will prevent holes from being made in the fabric during stitching. Bonus tip! Test your stitches and needle on a scrap of fabric.

  6. Jump in and practice. Every machine and fabric will behave a little differently so it’s important to practice and figure out which techniques work best for your machine.

I hope you enjoy this video. Let me know in the comments if there are any sewing topics that you’d like me to cover.