Hello sew-friends! Today, I’m continuing my mini series of videos on pattern adjustments. It is very common to need or want to make a few pattern adjustments when sewing your own clothing. Today, I’ll be showing you how to lengthen or shorten the sleeves of a pattern. This is a simple but very common pattern adjustment. I'll demonstrate how make the pattern adjustment to tapered and bell shaped sleeves and explain why you don't want to just adjust at the end of the sleeve.
If the video above is not working, you can also watch on YouTube.
If you want to jump ahead, the shorten section is at time stamp 1:35 and the lengthen section is at 4:30.
Side note: How much you adjust the length will depend on the pattern, your personal measurements and personal preference. In this video, we'll focus only on how to make the adjustment properly. An easy way to find the length you want is to compare the pattern to a similar style sleeve that you like the length of.
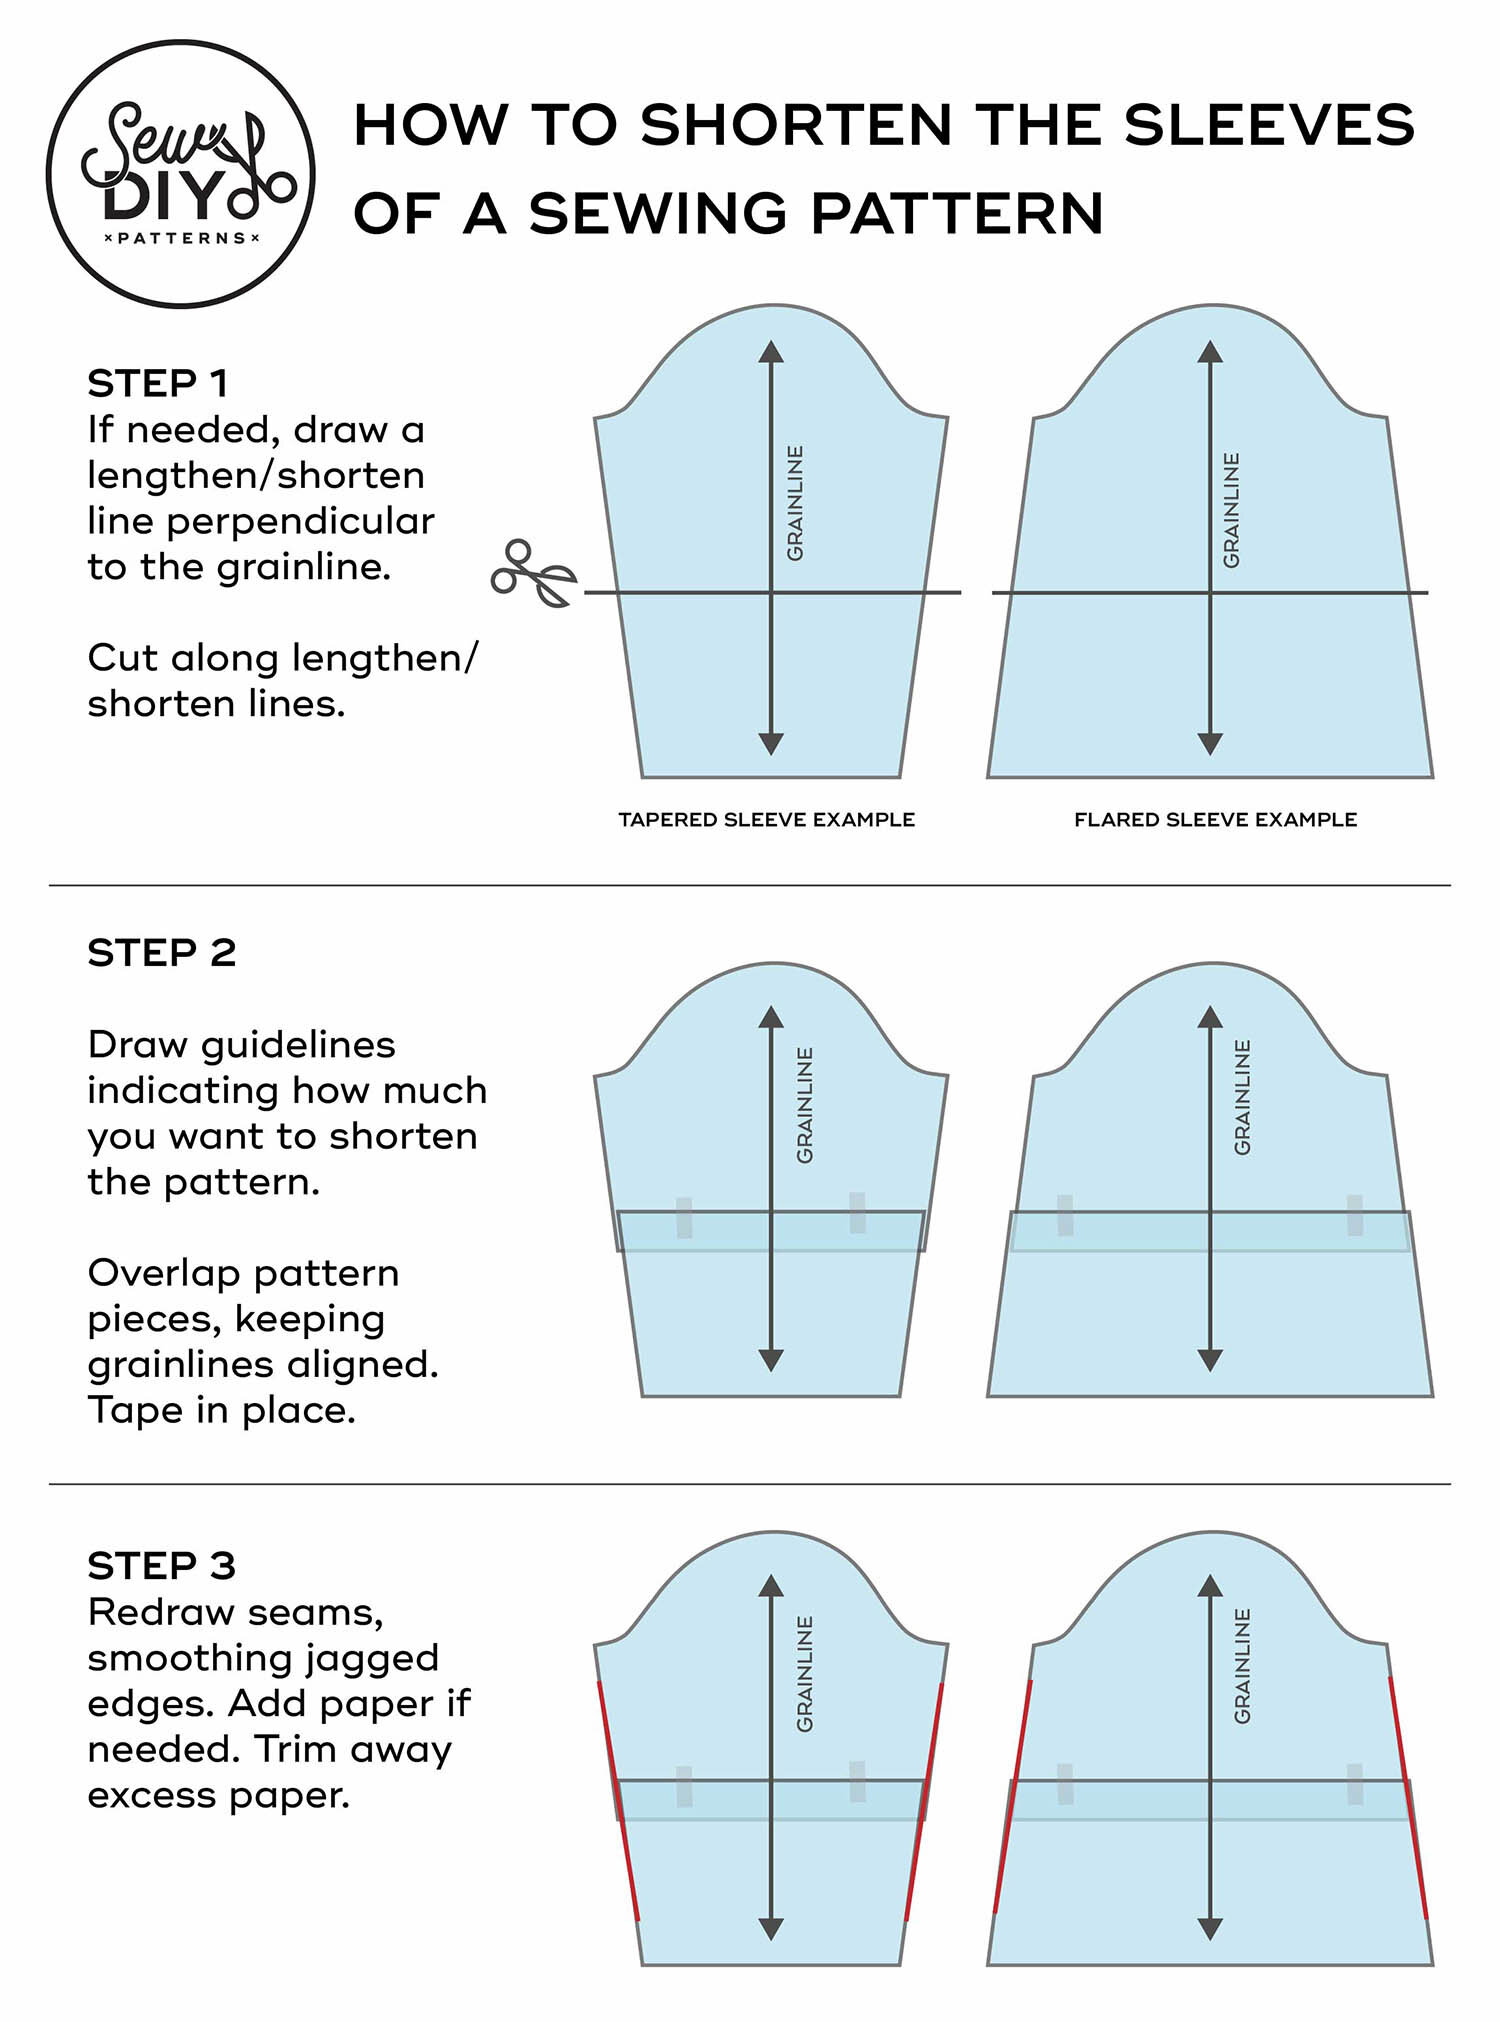
How to shorten the sleeves of a sewing pattern
Step 1: If your pattern does not have lengthen/shorten lines, you’ll need to draw one. (If you are making a large adjustment, we recommend drawing two lines, one in the bicep region and one in the forearm region.) Draw the lengthen/shorten line perpendicular to the grainline. Cut the pattern along this line(s).
Step 2: Draw a guideline above the lengthen/shorten line, indicating how much you want to shorten the pattern. Overlap the pattern pieces, aligning the lower pattern piece with the guideline above and keeping the grainlines aligned.
Step 3: Redraw the seams, smoothing out any jagged edges. Cut away any excess paper. You can use this pattern as is or trace it.
How to lengthen the sleeves of a sewing pattern
Step 1: If your pattern does not have lengthen/shorten lines, you’ll need to draw one. (If you are making a large adjustment, we recommend drawing two lines, one in the bicep region and one in the forearm region.) Draw the lengthen/shorten line perpendicular to the grainline. Cut the pattern along this line(s).
Step 2: Slide a piece of scrap paper under the pattern and tape the top part of the pattern to the scrap paper. Using a ruler, extend the grainline onto the scrap paper. Draw a guideline below the lengthen/shorten line, indicating how much you want to lengthen the pattern. Align the bottom pattern piece with the grainline and the guideline. Tape in place.
Step 3: Redraw the seams, smoothing out any jagged edges. Cut away any excess paper. You can use this pattern as is or trace it.
I hope that you found this video helpful. If you aren’t already subscribed to my YouTube channel, you can do so by clicking here. I have a few more videos fitting videos in the works, so make sure to stay tuned for those. Also, make sure to check out my Learn to Sew page, for more sewing tips and tutorials. And, if you’d like to support this free content, I invite you to visit the pattern shop here or at the links below. Happy sewing!


